Pages

Saturday 31 March 2012

Finished!

At last, I have finished remaking my rainbow granny!


Originally I had decided to add another 14 squares down the sides so that it was wide enough to drape properly over my chair, but when I came to look at my poor sad blanket I noticed that it had come apart in several places. So I decided to take it apart completely (you should have seen the look on everyone's faces when I started to hack into it!), reorganise the layout to add in the new squares amongst the old ones, then crochet four rounds around the edge to finish it off.


In the end I placed the squares fairly randomly, just making sure I hadn't got squares in the same colours next to each other. I'm glad I didn't overthink it actually!

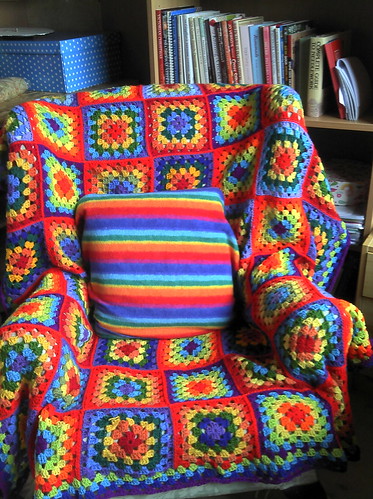
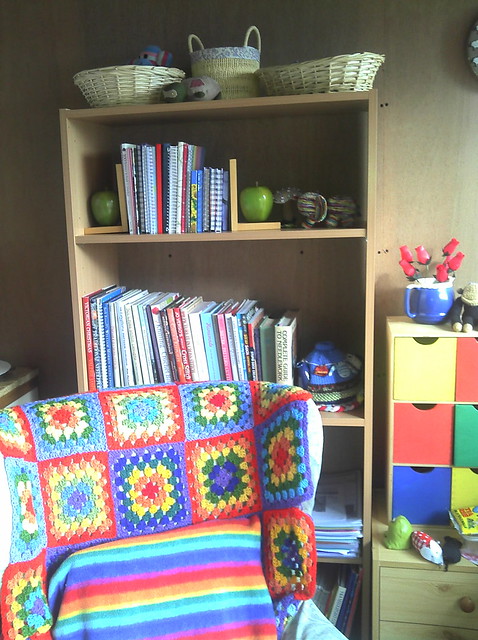
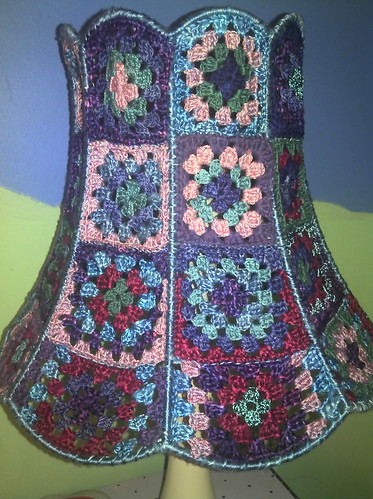
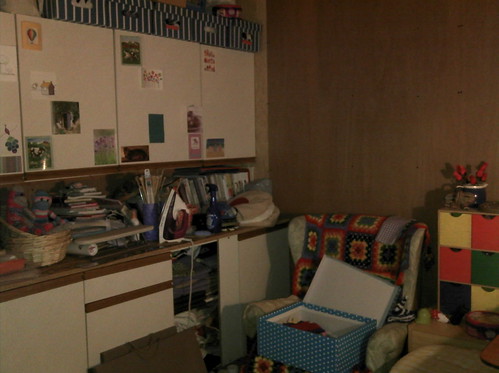
And here it is in all its technicolour glory, on my Parker Knoll chair in the shed. A little ray of sunshine happiness!

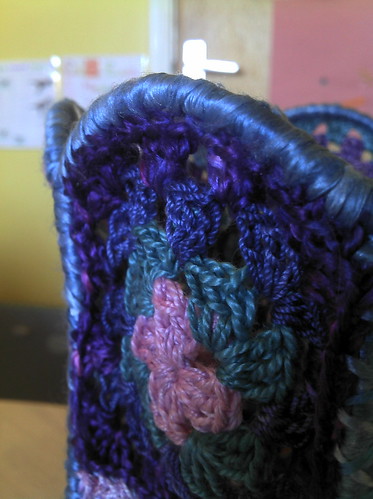
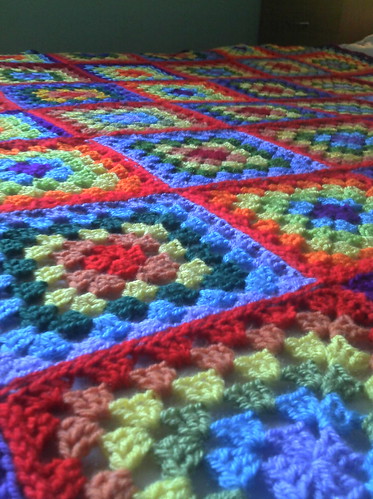
Rather than sewing the squares together this time, I used a fab technique I found on grumpy girl's blog - it's so clearly explained that even my crochet novice brain could understand it! I'm so pleased with the result, it lies really flat and is quite unobtrusive (and neat). It's definitely stronger than just sewing the squares together too. I will definitely use this technique again, maybe in a contrasting colour next time, Here it is in close-up so you can see how cool it is!


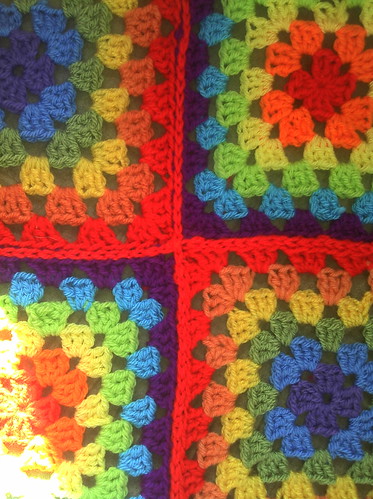
It was a bit bright and sunshiney when I took this photo (unlike today!) , but you can see how neatly it all joins up. Thank you for visiting!

Monday 26 March 2012

Easter bunnies

I was thinking about Easter, and making some rabbits. So I picked up my ubiquitous sock monkey, and had a wee think about the design ... and came up with this:


Isn't he sweet? I am very pleased with the way he turned out. I will be making a few more this week, let me know if you would like one!

Have a look at Handmade Monday for more lovely homemade crafts :o)

Friday 23 March 2012

Happy Friday!

Today the weather was gorgeous. In fact, I think it was warmer up here in Caithness than in most of the rest of the country! So this afternoon I took advantage and followed the example of Lucy at Attic 24 and went for a trip down to the beach.

Unlike Lucy, I really have no excuse for finding the time to visit the seaside, as I live less than a mile away! So I parked in the town and after a quick visit to the bank, set off down to the beach.

Thurso is a lovely town - we are very fortunate to still have a lot of little independent shops here. It has real character and plenty of useful stores where you can get what you need.


This is one of my favourite gift shops in the town - there's lots of lovely bits and pieces in here. The sun was so bright at this point that I found it very hard to take a picture!


Then on down the road for my first glimpse of the sea. What wonderful colours!


It was lovely and quiet at the beach.


The beach is a mix of sand and stones. The stones are wonderful, a lovely palette of colours and different shapes, all sharing the same characteristic flat surfaces. Very nice to walk on, and to look at.


(Incidentally, I had initially uploaded this picture the wrong way up. How can you possibly tell? I hear you ask. I honestly don't know! But it looked "wrong" the other way up and "right" this way up. Logic tells me it must be something to do with the shadows but I can't see how!)

The other lovely thing about the stones is that, being flat, they make great towers:


I can never resist leaving at least one or two behind when I leave. It's the child in me.

After sitting and enjoying the sun, the sounds of the gently breaking waves, the birdsong, and the rather stiff breeze, I settled down with my ipod set to Radio 3 with the sound turned down low (so I could still hear all the above!).


(and yes, for the eagle-eyed amongst you, that is the battery indicator right down to the red, and yet it happily lasted right up until I left the beach!).

I then got out my sketchbook and did a rapid sketch of the cliffs looking towards Scrabster. The breeze was really getting up by the time I finished so I had to hold the paper still whilst I  took the picture!


I was struck by the number of straight lines in the view, and decided to concentrate on emphasising those. A very rough sketch, but very pleasing to carry out. (Though next time I might take something to sit on as I was rather cold and numb round the rear end by the time I finished!). Sadly, the picture I took of the actual view I was sketching didn't come out very well, so you'll just have to take my word for it that it's a very accurate drawing ;-)

I was very tempted on the way back to town to have an ice-cream from the seafront cafe:


But I resisted. Maybe another day.

Tuesday 20 March 2012

Spring has sprung ...

The grass is riz ...
I wonder where dem birdies is ...


De little birdz is on de wing ...


Ain't dat absurd!

De little wings is on de bird!!


(Poem often attributed to ee cummings but it is in fact anonymous)

Sleepy birdies now for sale! If you are local to me you will find them at Eye Candy, if you are not local and would like one then just let me know (either leave me a comment on here, or message me on Facebook and I'll get back to you straight away). The birdies on a stick are £5 each and the handbag charms are £5 also. Please note, that due to packing issues the birdies will be sent without a stick (an ordinary wooden skewer will do the trick!). They look lovely nestling amongst your plants or snuggling up in a pen pot, or even as a wee flock in a vase!

I'm thinking I might make some with wire feet that could then "roost" on a plant, or picture frame ... mmm!

More fun things tomorrow - I'm working on easter rabbits just now.

Sunday 18 March 2012

I love Pinterest!

I discovered Pinterest a few months ago and it has really changed the way I research what I am going to make next. I was doing my own version of collecting on-line inspiration, but boy it was hard work, cumbersome, and often involved losing stuff! If I had a good colour printer I would probably have contemplated printing some things out, just so I could keep them!

For many years I have kept what I call "happy books" - scrapbooks filled with pictures I love or find inspiring - and I still do keep these to hand for pictures I cut from magazines or birthday cards I receive. There's still a place for the book and the paper record after all. But I find Pinterest incredibly absorbing and a great way to find inspiration whilst I have a quick cuppa tea.

It was on Pinterest that I discovered Planet Penny , a fellow crafter who is as mad about rainbows as I am. I first discovered (and fell in love with) Penny's rainbow mice:
Aren't they just gorgeous?? Penny has now written a pattern for these so I shall have a go at making them myself.

I also found a picture of some lovely storage jars that Penny has decorated - look:
 I fell in love with the "stuff jar" and decided to do something similar to a container I use for putting in all the little bits of cotton and scraps that I always seem to accumulate (usually on my sleeves!) when I am sewing. It was plain plastic and a little boring. However it looks a bit more interesting now!
 A little progress has been made on the shed. It is still in need of painting (I fear that might take a while!), but I did manage to put up some bookshelves earlier in the week. That means about half of my worktop is now clear, so I can utilise it a little better. The aim is not to just clutter it up with junk!
My current evening project is making some more granny squares for my rainbow granny that is covering my old Parker Knoll chair in my shed. This is my "sitting and knitting" chair which is ever so comfy but definitely benefits from a cheerier look! As you can see it doesn't quite cover the chair at the sides so I am in the process of adding a couple more rows down the side.

I've also been making some lovely spring goodies for sale ... watch out for a post later in the week!

Tuesday 13 March 2012

Putting a little light on the subject

At last, it is finished! The first of my long-term projects which I showed in close-up earlier on this month. And here it is all done:

This is not its final resting place, as it will be going out in my shed/studio when that is decorated, but I put it on my bedside table just for now so you can admire it.

There's a lot of work gone into it. Firstly I wrapped the wire frame in pale blue silk. Then I crocheted squares in the right sizes to fill the gaps, attaching them as I went along. This was perhaps a little easier than you might think, as crochet is very stretchy so I didn't have to faff about with the pattern to make it fit the shape, just stretched it into place! For the second row down, I just used a slightly larger hook and slightly thicker yarn (I've used a mixture of silk and cotton, all hand-dyed by a lovely artist friend of mine).


The third row down was the trickiest as I had to increase the square towards the bottom - however after a bit of trial and error I found it easy enough to do.

However it really looks its best when you switch it on ...

Pretty, huh?

Thursday 8 March 2012

A repair with bite!


My youngest son Euan loves his combat trousers, but they had already taken a hammering by his big brother before they were passed on to him, so it wasn't long before the knee bit the dust. He really wanted to keep them though, so I promised to repair them for him. As a surprise, I turned a boring patch into a biting one!

First of all, I trimmed all the loose threads around the knee where the material had torn (actually I've just noticed that I hadn't actually done that when I took this picture! Let's just pretend I did then).


Next, I cut out the elements of the patch: a black oval shape for the mouth, two rows of sharp teeth, and a small semi-circle for the tongue.


I used felt for my shapes so that I didn't have any seams to deal with; hopefully it will stand up to a bit of wear and tear!

Next, I used dots of fabric glue to assemble all the parts of the patch before sewing it on to the trousers:


Then I attached the patch by machine using white thread. It's a bit of a faff doing it by machine, as I had to do each side separately, but I wanted to make sure it was really firmly attached. After machine sewing, I went round with a bit of black thread to make doubly sure the tongue and the sides of the mouth weren't going to work loose.

Result - one very happy boy!

In other exciting news - I finished my nearly-finished long-term project this afternoon! It's taken me over six months altogether and I am so delighted with it. I will post some pictures of it very soon.

Tuesday 6 March 2012

Three large projects

I've got three long-term projects on the go at the moment.

This one is nearly finished ...
... so you only get a wee glimpse of it before I reveal the final result! Can you guess what it is?

This one is about halfway through ...


... and I will tell you about this one! It is going to be a patchwork skirt in rainbow colours. I'm sure I will look pretty mad in it but I don't care! I love rainbows so much, it will certainly cheer me up to wear it! I have been collecting fabric for over a year now, and cutting it into 10cm squares. Each row is half as long again as the row above, so there is a bit of gentle gathering going on. The final row will contain 168 squares! I am now sewing them all together in their rows on my serger to ensure there are no fraying ends, then the fun of gathering starts! A lot more to do yet before I can reveal the finished skirt.

And this project is yet to start ...

This is my lovely studio. It is warm, it is (fairly) dry ... but it is as yet undecorated (and rather messy in this picture!). My aim is to paint it inside, and add something to the walls (probably some shelving, definitely some artwork!). There is also, at the opposite end of the shed, a lot of boxes that need storing elswhere, and once I manage to get rid of those I can get on with the decorating. I am very lucky to have this space, and really want to make the most of it!

Sunday 4 March 2012

An alternative use for leftover sock yarn

I love knitting socks. Once you have made your first pair I swear you become hooked. They are a lot simpler to make than it appears at first, you can have so much fun with pattern and colour, and they are so nice to wear.

However, I find I always have lots of sock yarn left over - not enough to knit into another pair of socks, but enough to make me want to do something with it. Lots of sock knitters make sock yarn blankets with their leftovers, but whilst I find them lovely to look at, I like my blankets to be big and heavy, so a blanket didn't really appeal to me.

So, I decided to make a pair of leggings with my leftovers, and I am really pleased with the final results. I like to wear them under a long sweater, or with a skirt over the top, and they are great in our cold Scottish winter weather.

I loosely followed a pattern which I found on Ravelry, called Super Easy Leggings by Phoenix Bess. And she was right, they really were super easy!  They didn't even take as long as I expected to make, about two months in all. I sewed the ends in as I went along to make it a less daunting prospect!

Thank you to my very kind friend Helen who bought me the pattern!

Friday 2 March 2012

More adventures in drawing

As a member of a brilliant local arts group, I had the opportunity yesterday to be go to a drawing class, the first I had done in about 15 years. Despite being an inveterate doodler, I am no artist, but very keen to brush up my skills (excuse the very bad pun!). At the start of the class we were presented with a fabulous A3 pink pig art pad to keep (yay!), and given lots of tips and ideas on how to draw faces.

My major problem is this (and I wonder if other people find the same): if I have a tutor standing behind me (not literally, but in the room offering encouragement), the artistry flows and I produce some nice pieces. M'lud, the first exhibit:


This one took me about ten minutes, and I didn't try very hard, I was just trying to capture the essence of the shapes. Yet it's not bad.

Exhibit two:

This one I did even faster, as I was running out of time, and very keen to try out the technique of using bleach as a highlighter (it's a bit blobby but you can see how well it works along the nose). Again, not perfect (I didn't look back at the eyes so they don't match up very well in size!), but not bad. And each of these portraits I did in pen, so no rubbing out involved.

So - this afternoon I decided to have a go on my own. I pick a photograph as a reference, and spend about forty minutes producing a sketch. I hope you realise how selfless I am being in sharing this with you!


As you can see, the proportions are all wrong ... and somehow, there's no life in it. Although I enjoyed the process I am not at all happy with the end result, and despite lots of rubbing out and repositioning of just about everything, I still couldn't get it right. I haven't the confidence to draw without someone standing behind me saying "go on, you can do it!" - which would work out very expensive if I needed a cheerer every time I got the sketchbook out!

Never mind, we will get another session with the tutor soon and I will have another go at honing my skills. In the meantime, I shall carry on practicing (though I may not be brave enough to share the results!)